1. Download the Packages
This guide will assist you with installing CleanSpeak Management Interface on your server (Linux, macOS, or Windows) and works equally well for development environments.
Log into the CleanSpeak website at https://account.cleanspeak.com/account/, navigate to the Licenses section, and click on Download CleanSpeak. You will need to download the CleanSpeak Management Interface package that matches the operating system you will be installing CleanSpeak on.
2. Red Hat
Use the RPM bundle to install on a Red Hat system (including Fedora and CentOS). Execute this command to install the CleanSpeak Management Interface RPM (replace with the correct <version> number):
$ sudo rpm -i cleanspeak-management-interface-<version>.rpm3. Debian
Use the DEB bundle to install on a Debian system (including Ubuntu, Mint, and Debian base). Execute this command to install the CleanSpeak Management Interface DEB (replace <version> with the correct version number):
$ sudo dpkg -i cleanspeak-management-interface-<version>.deb4. macOS
To install on macOS, use the ZIP bundle. Extract the CleanSpeak Management Interface ZIP file anywhere on the file system. Remember where you extract the file. This location will be referred to as CLEANSPEAK_HOME. We suggest extracting this file to a directory like /usr/local/cleanspeak.
|
You can install CleanSpeak in any directory including your home directory. This is a good choice for development machines or when you don’t have or want to use sudo to install CleanSpeak. |
Once the zip bundle has been extracted, the directory structure should look similar to this. If you installed somewhere other the default CLEANSPEAK_HOME, your directory structure will be different, this is only for shown as an example.
/usr/local/cleanspeak/config
/usr/local/cleanspeak/config/keystore
/usr/local/cleanspeak/config/cleanspeak.properties
/usr/local/cleanspeak/cleanspeak-management-interface
5. Windows
To install on Windows, use the ZIP bundle. Extract the CleanSpeak Management Interface ZIP file anywhere on the file system. Remember where you extract the file. This location will be referred to as CLEANSPEAK_HOME. We suggest extracting this file to a directory such as C:\cleanspeak on Windows.
Once the zip bundle has been extracted, the directory structure should look similar. If you installed somewhere other than the default CLEANSPEAK_HOME, your directory structure would be different, this is only shown as an example.
C:\cleanspeak\config
C:\cleanspeak\config\keystore
C:\cleanspeak\config\cleanspeak.properties
C:\cleanspeak\cleanspeak-management-interface\
Next, install the Windows service by changing to the directory you installed CleanSpeak (i.e. C:\cleanspeak\cleanspeak-management-interface\apache-tomcat\bin) and then running the install command. Here are those two steps:
C:\>cd C:\cleanspeak\cleanspeak-management-interface\apache-tomcat\bin
C:\cleanspeak\cleanspeak-management-interface\apache-tomcat\bin>CleanSpeakManagementInterface.exe /install
6. Service Name
As long as your installation method installed CleanSpeak Management Interface as a service, the service name will be as follows:
Service Name |
|
|---|
You can use the operating system commands to start, stop and check the status of CleanSpeak using this service name.
7. Start CleanSpeak Management Interface
Next, you need to start CleanSpeak Management Interface so that you can enter Maintenance Mode and allow CleanSpeak to create the database. Use the instructions below to start CleanSpeak based on the platform you installed it on. Also, note that the CLEANSPEAK_HOME directory is where you installed CleanSpeak Management Interface.
|
Maintenance Mode makes installation simple. However, sometimes it is not possible to use Maintenance Mode. For example, if you are doing an unattended install to a server. You can edit the CleanSpeak configuration files and install the database schema via the command-line using the Advanced Installation instructions below. If you do not use Maintenance Mode to configure CleanSpeak, do not start CleanSpeak at this point. Instead, skip the to Advanced Installation section and then return to this section after you have configured CleanSpeak and the database via the command-line. |
$ sudo service cleanspeak-management-interface start$ <CLEANSPEAK_HOME>/cleanspeak-management-interface/apache-tomcat/bin/startup.shC:\cleanspeak\cleanspeak-management-interface\apache-tomcat\bin>startup.batC:\> net start CleanSpeakManagementInterface8. Maintenance Mode
You will access the CleanSpeak Maintenance Mode setup via the browser. If you installed CleanSpeak Management Interface on your local machine, you’d access this interface by opening http://localhost:8011 in your browser. If CleanSpeak is running on a remote server, change the server name in the URL to match your server’s name.
The first step of Maintenance Mode will prompt you to enter your license Id. You can retrieve your license Id from the CleanSpeak website by logging into your account here: https://account.cleanspeak.com/account/
You should see a screen that looks like this:
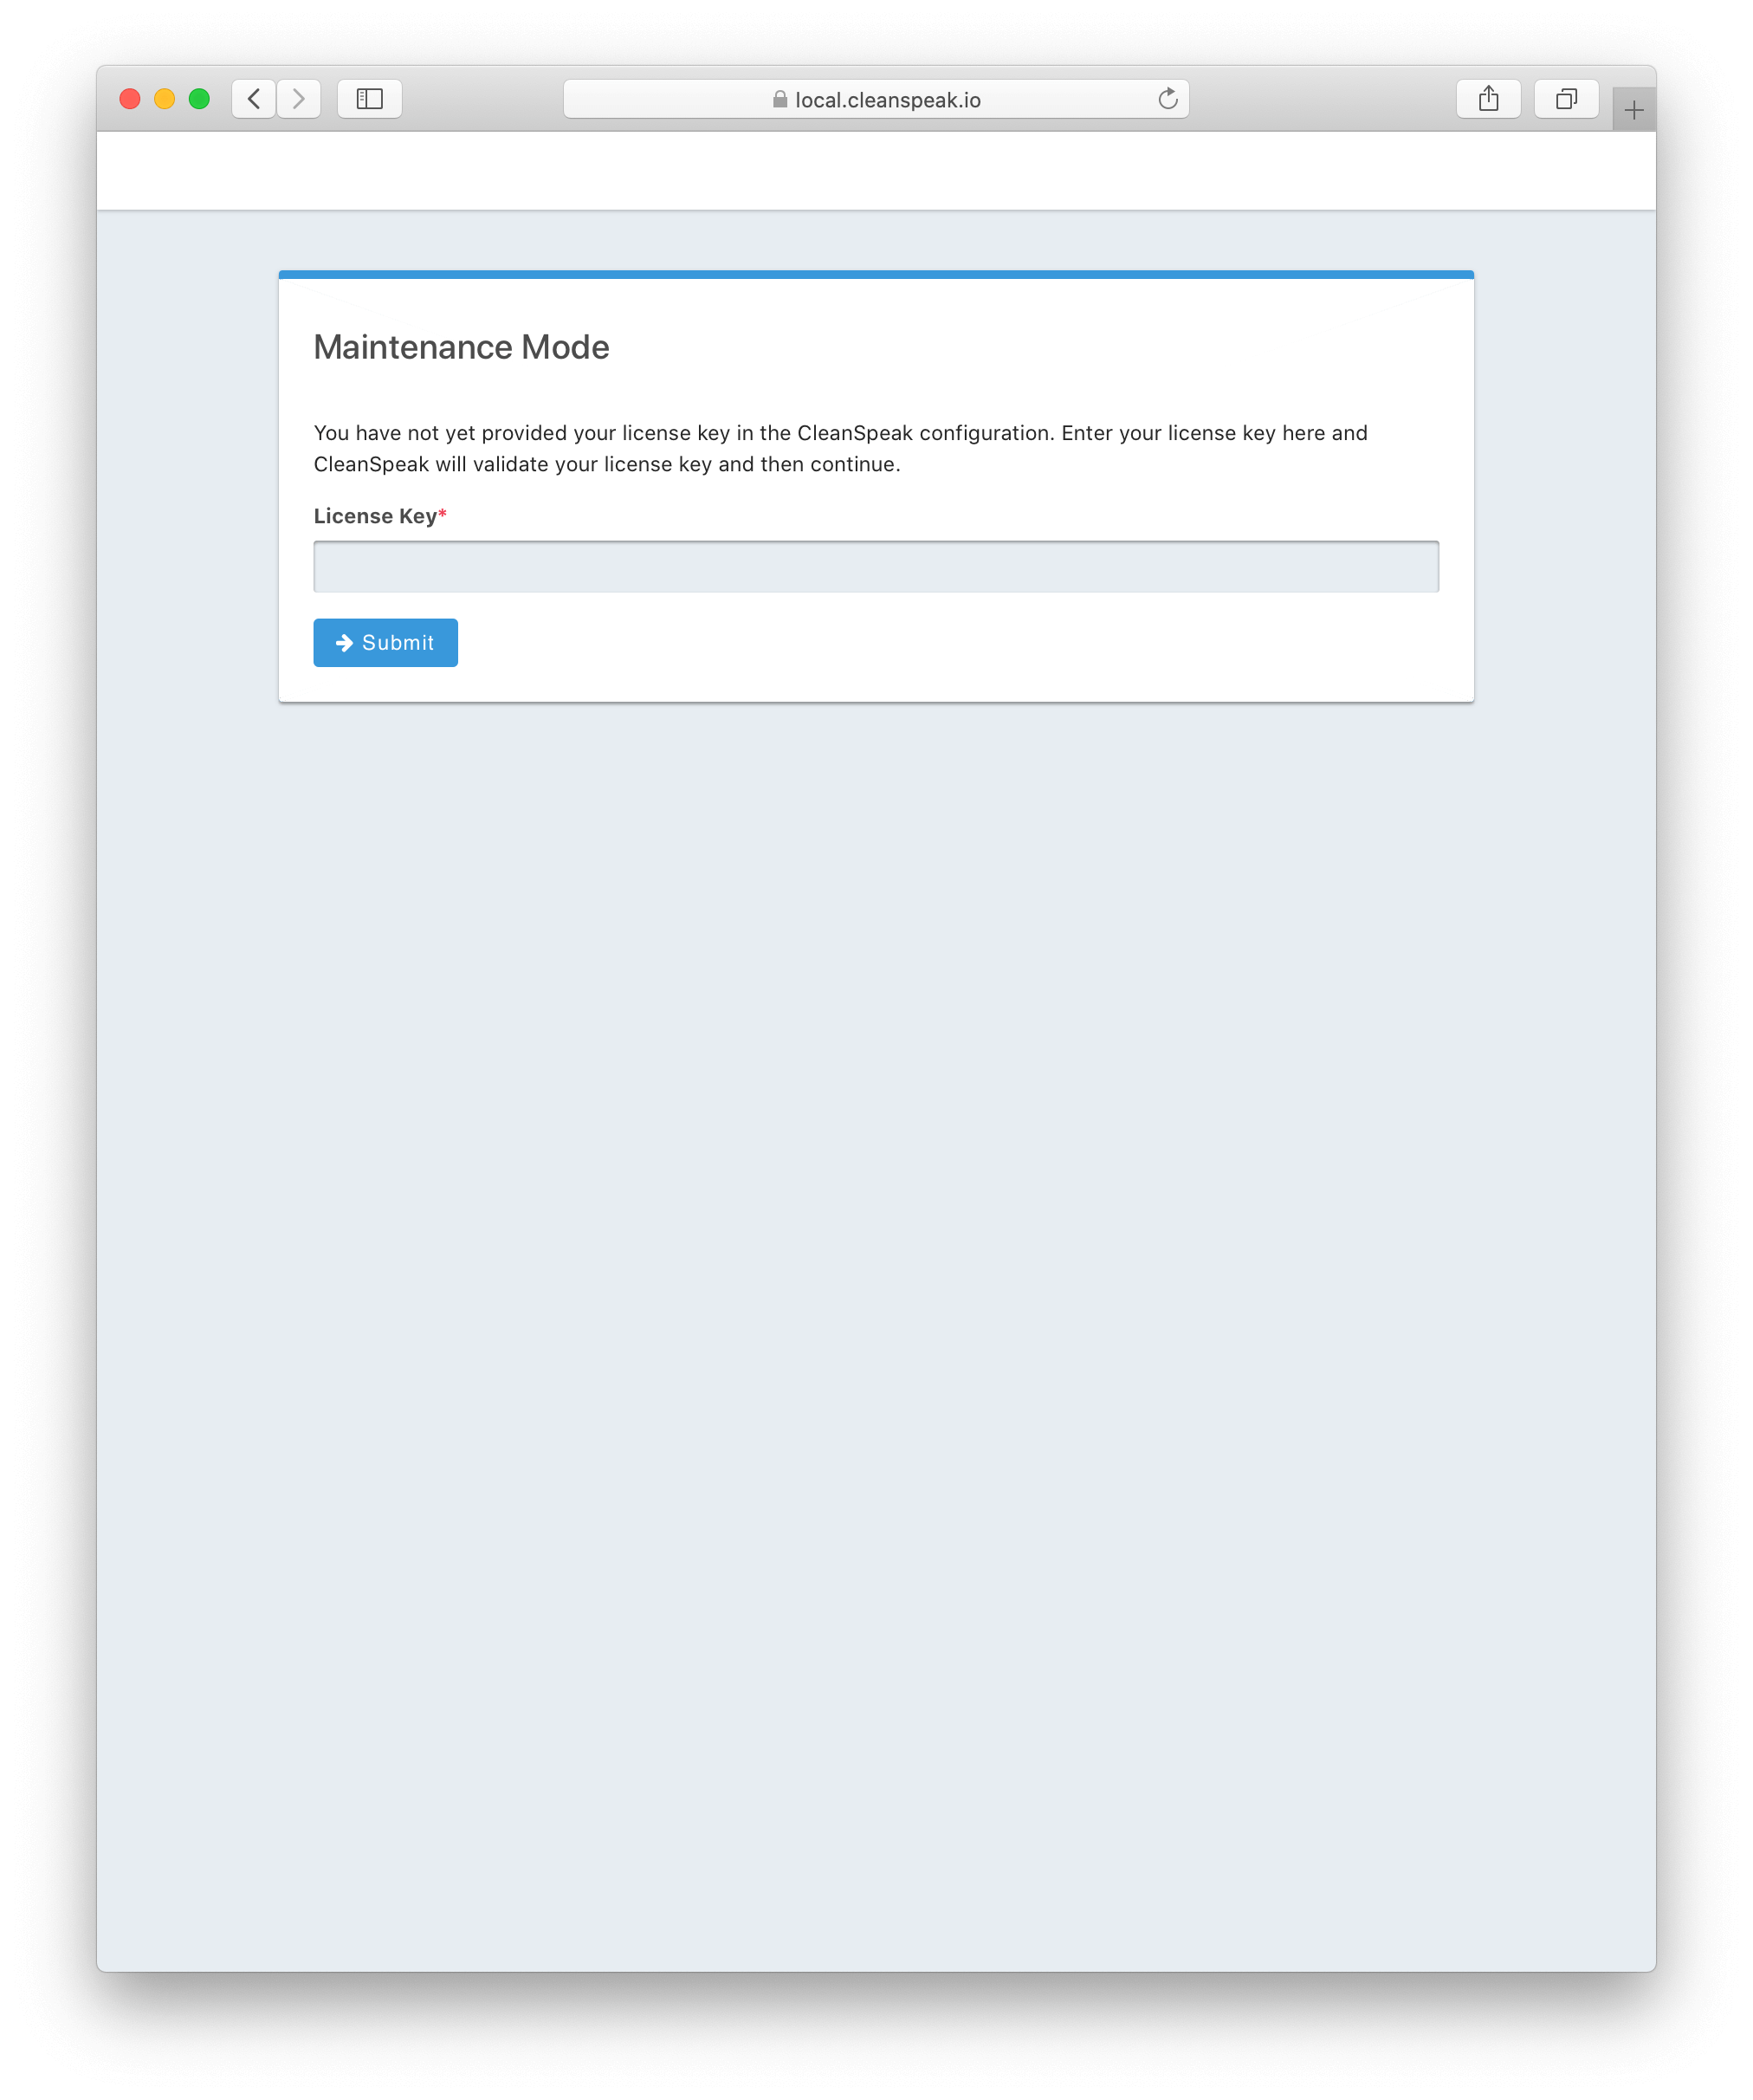
Your license Id will be written out to the CleanSpeak configuration file in case you need to change it in the future.
In the next step of Maintenance Mode you will see a screen like this:
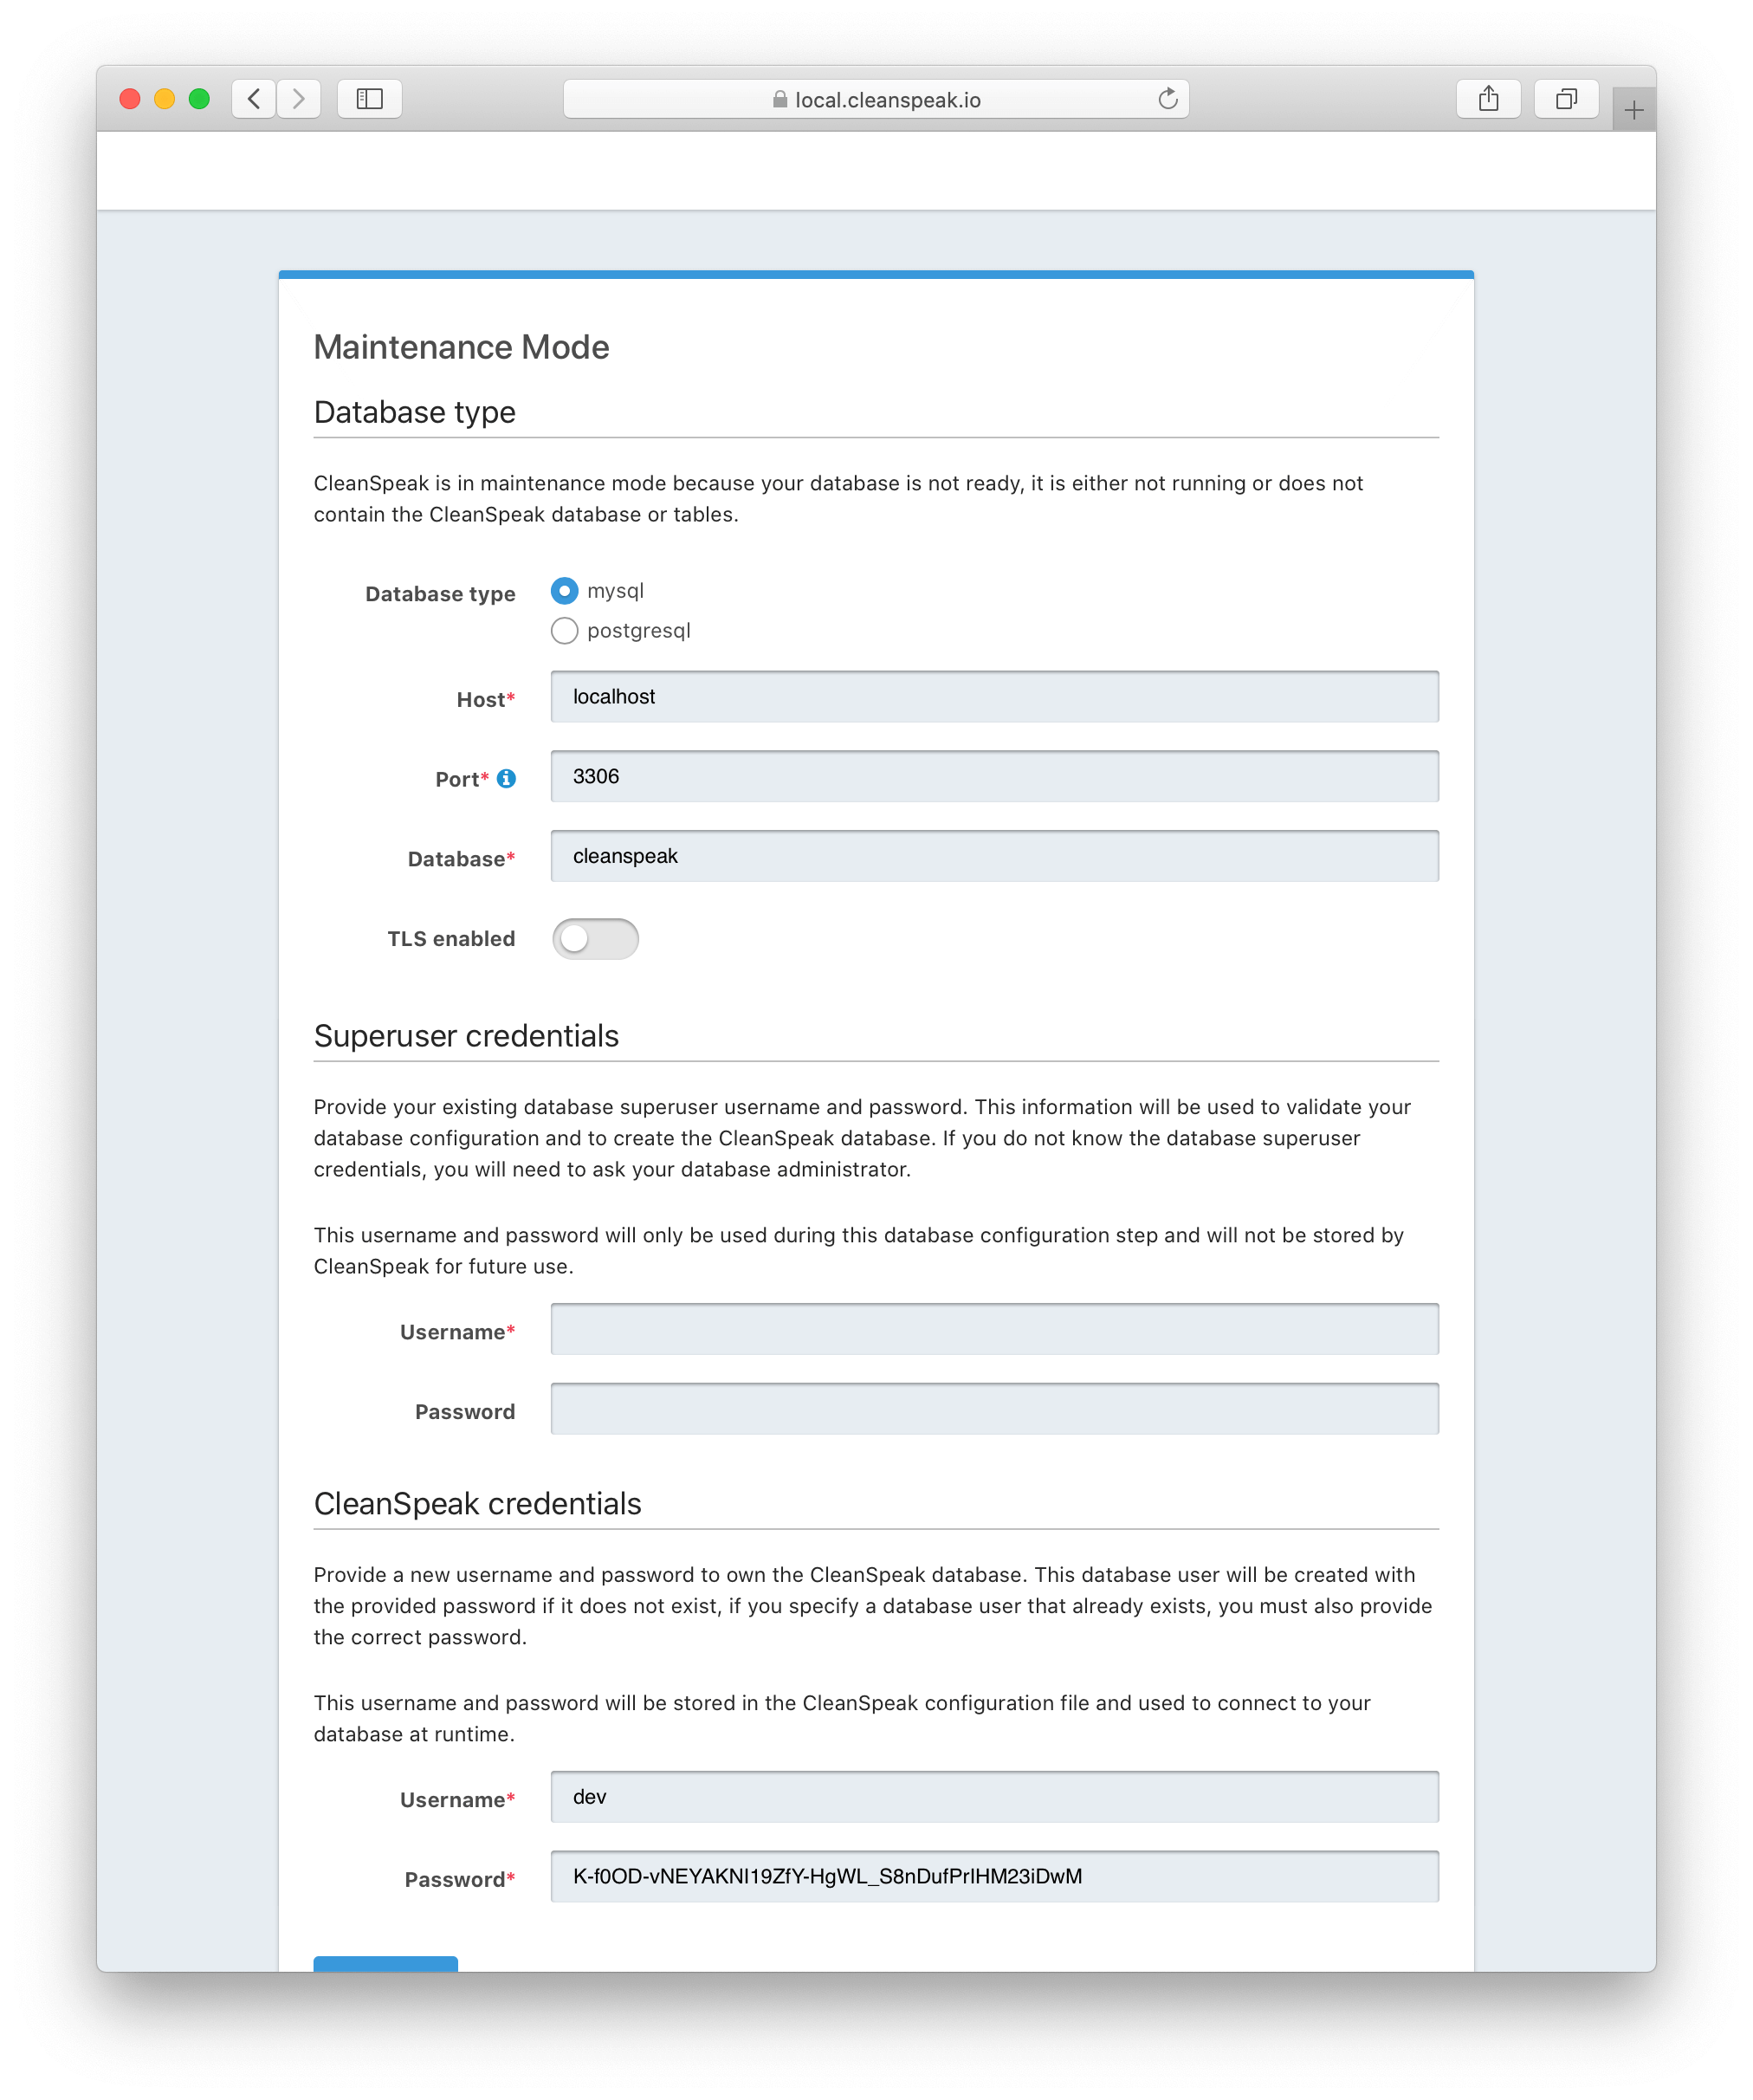
You will need to confirm that the database server name, port, database type, and name are all correct. Below these fields are the superuser username and password credentials. You need to supply CleanSpeak with the username and password for a database user that has access to create new databases and schemas. Below this section are the username and password that CleanSpeak will use to connect to the database. You should ensure that all of these fields are correct and then hit the submit button.
After you hit submit, you should see a screen that indicates that CleanSpeak Management Interface is starting. After this screen disappears, CleanSpeak Management Interface will be fully installed, configured, and running.
9. Advanced Installation
These instructions will assist you in editing the CleanSpeak Management Interface configuration file and installing the database schema via the command-line. You can skip this section if you used Maintenance Mode to configure CleanSpeak Management Interface.
9.1. Database Schema
|
Security
By default, the application is configured to connect to the database named |
In the following examples, <root_user> is the name of the root user for your database. The <root_user> must be either the root user or a user that has privileges to create databases. For MySQL, this is generally a user named root; on PostgreSQL, this is generally a user named postgres. Run the following SQL commands to configure the database for use by CleanSpeak.
# Create the cleanspeak database, replace <root_user> a valid superuser.
mysql --default-character-set=utf8 -u<root_user> -e "create database cleanspeak character set = 'utf8mb4' collate = 'utf8mb4_bin';"

# Grant cleanspeak all authority to cleanspeak database, replace <root_user> a valid superuser.
mysql --default-character-set=utf8mb4 -u<root_user> -e "grant all on cleanspeak.* to 'cleanspeak'@'localhost' identified by 'cleanspeak'" cleanspeak

# Create CleanSpeak schema, run this command from the directory where you have extracted the CleanSpeak Database Schema zip
mysql --default-character-set=utf8mb4 -ucleanspeak -pcleanspeak cleanspeak < mysql.sql# Create the cleanspeak database, replace <root_user> a valid superuser.
psql -U<root_user> -c "CREATE DATABASE cleanspeak ENCODING 'UTF-8' LC_CTYPE 'en_US.UTF-8' LC_COLLATE 'en_US.UTF-8' TEMPLATE template0"
# Note, if installing on Windows, the Encoding values are different, replace the previous command with this version.
psql -U<root_user> -c "CREATE DATABASE cleanspeak ENCODING 'UTF-8' LC_CTYPE 'English_United States' LC_COLLATE 'English_United States' TEMPLATE template0;"
# Grant cleanspeak all authority to cleanspeak database, replace <root_user> and <password> with valid superuser credentials.
psql -U<root_user> -c "CREATE ROLE cleanspeak WITH LOGIN PASSWORD '<password>'; GRANT ALL PRIVILEGES ON DATABASE cleanspeak TO cleanspeak; ALTER DATABASE cleanspeak OWNER TO cleanspeak;"
# Create CleanSpeak schema, run this command from the directory where you have extracted the CleanSpeak Database Schema zip
psql -Ucleanspeak cleanspeak < postgresql.sql9.2. Configuration
Before starting CleanSpeak Management Interface for the first time, you’ll need to add your license Id and verify your database connection in the CleanSpeak configuration. The name of this file is cleanspeak.properties.
The configuration file may be found in the following directory, assuming you installed it in the default locations. If you have installed it in an alternate location, the path to this file will be different.
- Windows
-
C:\cleanspeak\config - macOS or Linux
-
/usr/local/cleanspeak/config
For more information about the other configuration options found in this file, see the Configuration Reference section.
Find the license Id field at the top of this configuration file and enter your license Id. You can find your License Id by logging into your account at https://account.cleanspeak.com/account/.
license.id=Find the default database JDBC URL, username, and password values, and verify this information is correct. The default JDBC URL is configured for MySQL. If you’re using PostgreSQL, you’ll need to update the URL. See the database URL property documentation in the Configuration Reference for more information.
database.url=jdbc:mysql://localhost:3306/cleanspeak
database.username=cleanspeak
database.password=cleanspeak
CleanSpeak Management Interface should now be configured, the database should be created, and everything should be ready to run. You can start CleanSpeak Management Interface using the instructions in the Start CleanSpeak Management Interface section above.