1. Configure OpenID Connect
OpenID Connect is an extension that adds identity to OAuth2.
To configure OpenID Connect you need 3 things
-
Client ID
-
Client Secret (Sometimes empty/not required)
-
Issuer (99% of the time this is just the domain of the provider) Ex: http://login.example.com.
1.1. FusionAuth Example
In the following example we will setup a FusionAuth OpenID Connect configuration. We need to give it a name and a tenant (if there is a tenant other than the default). Then click save.
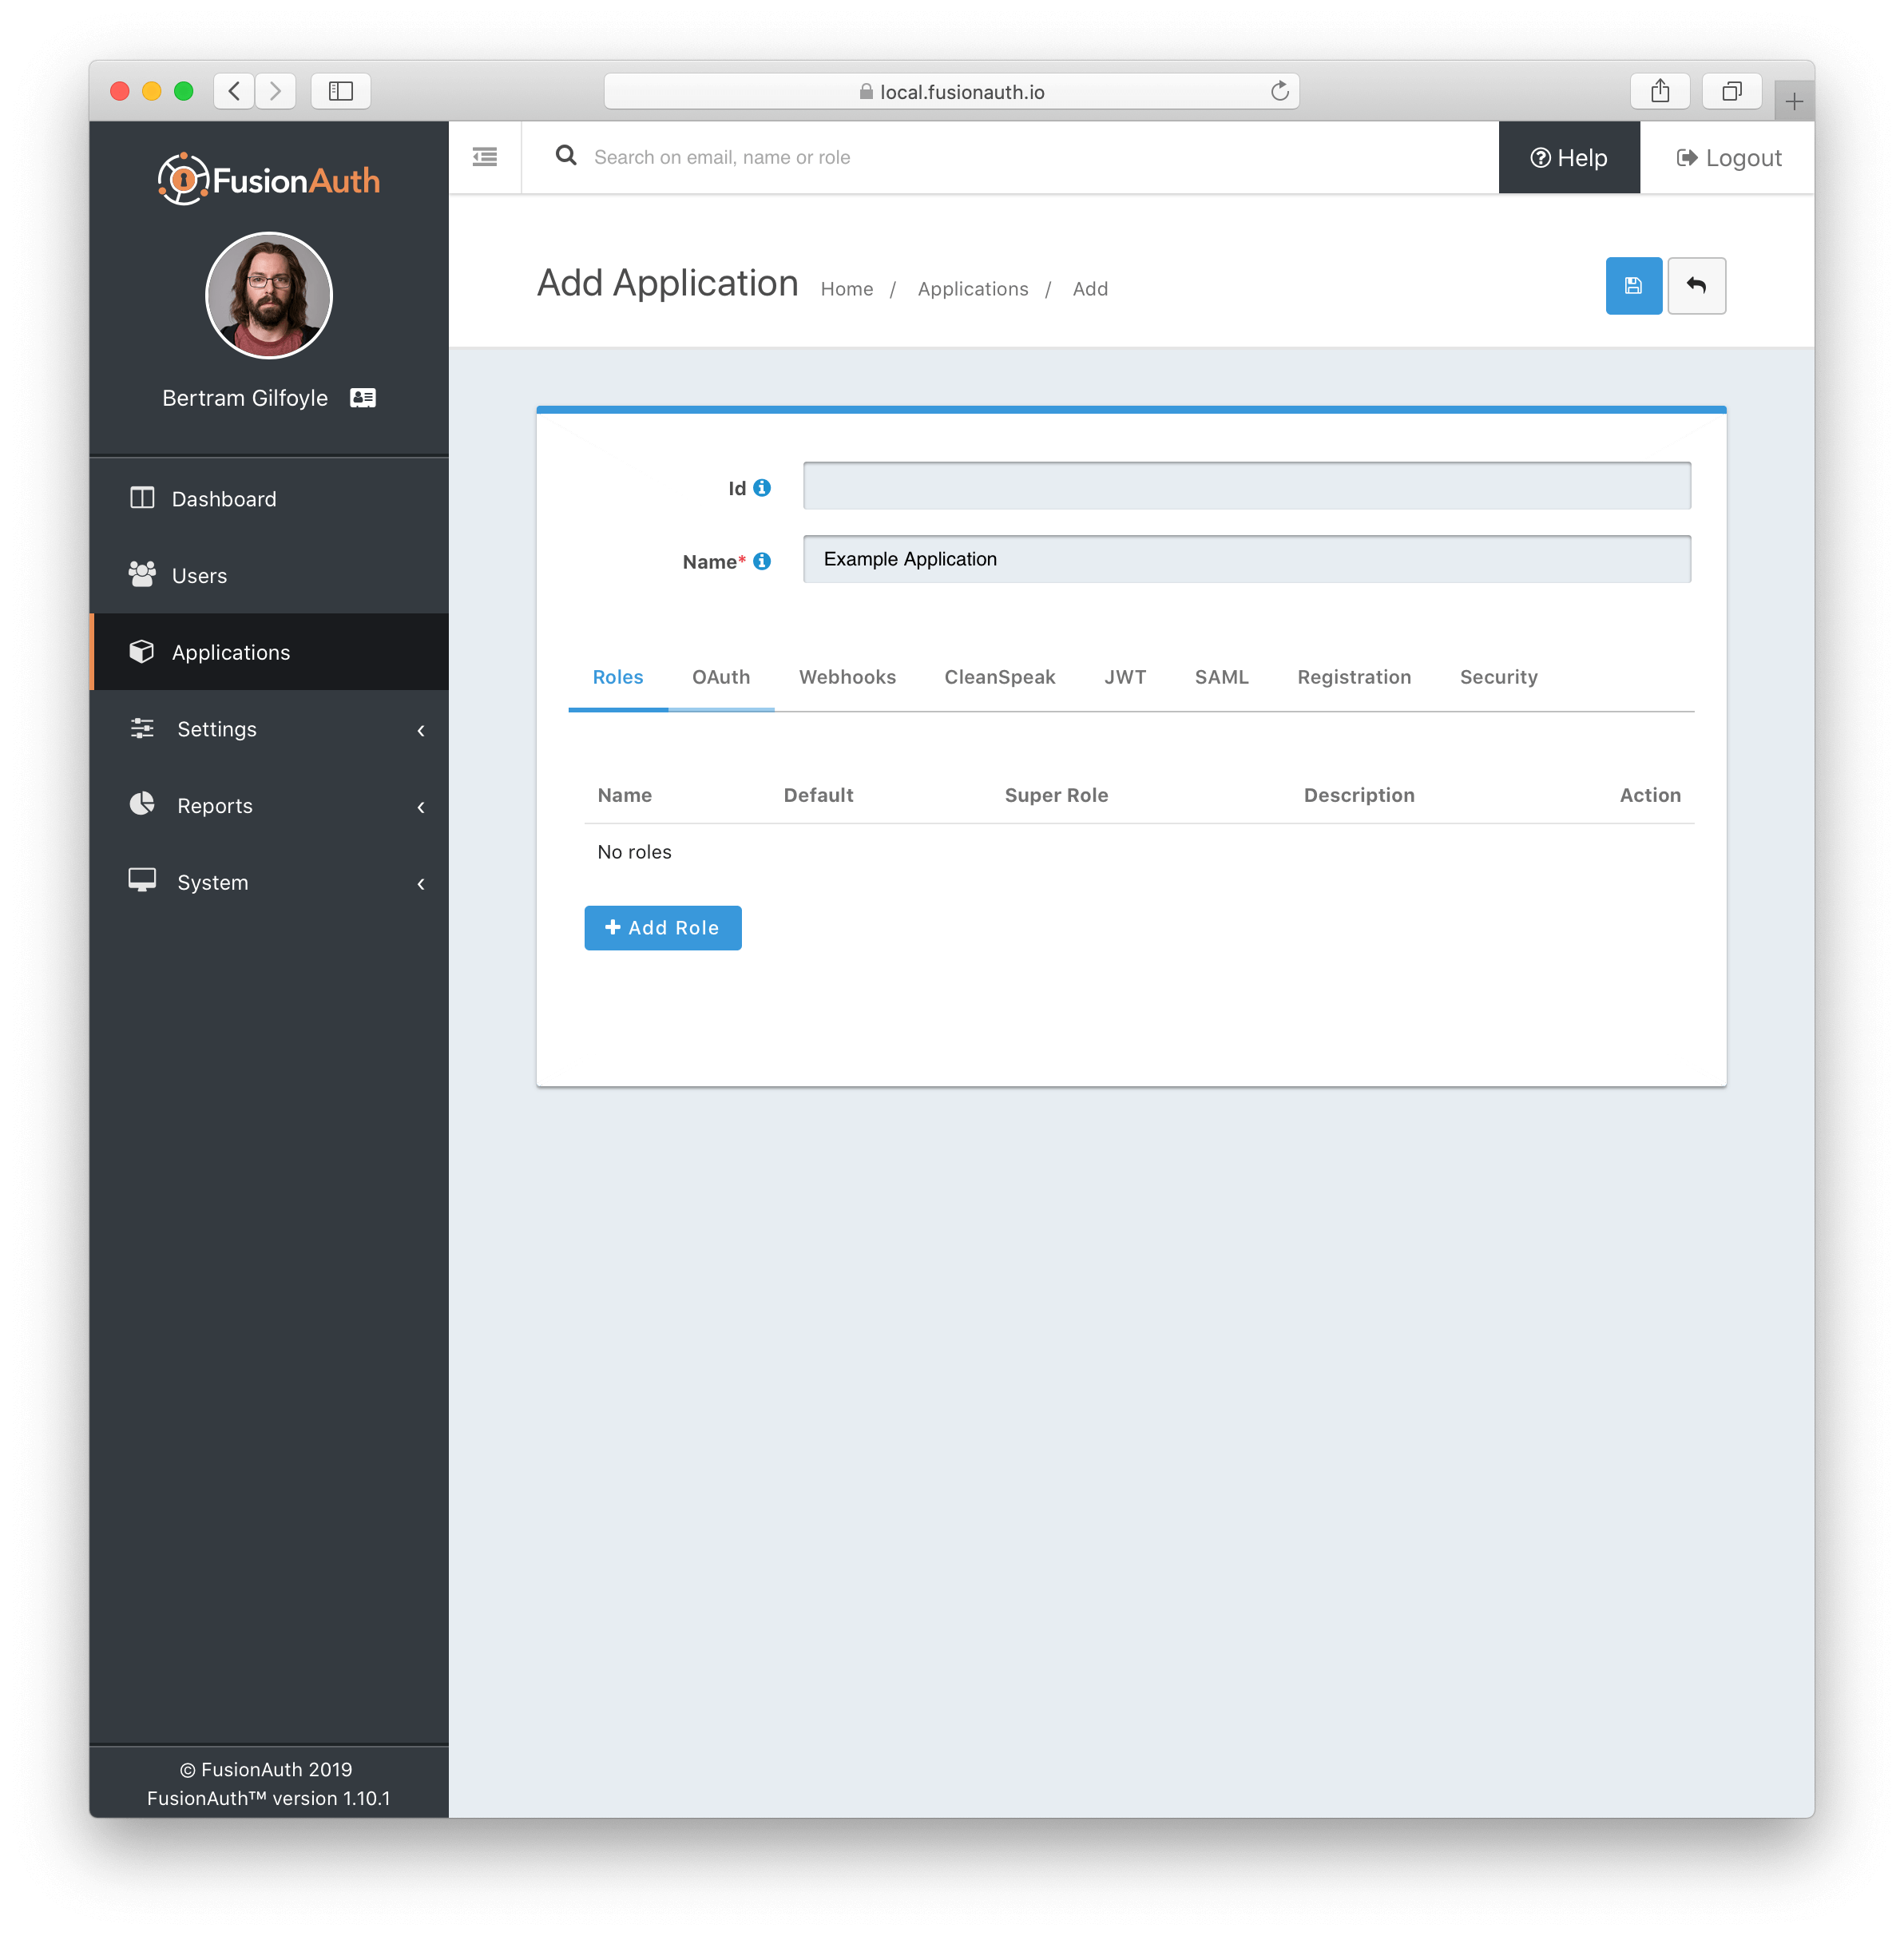
1.1.1. First we need to create a FusionAuth application.
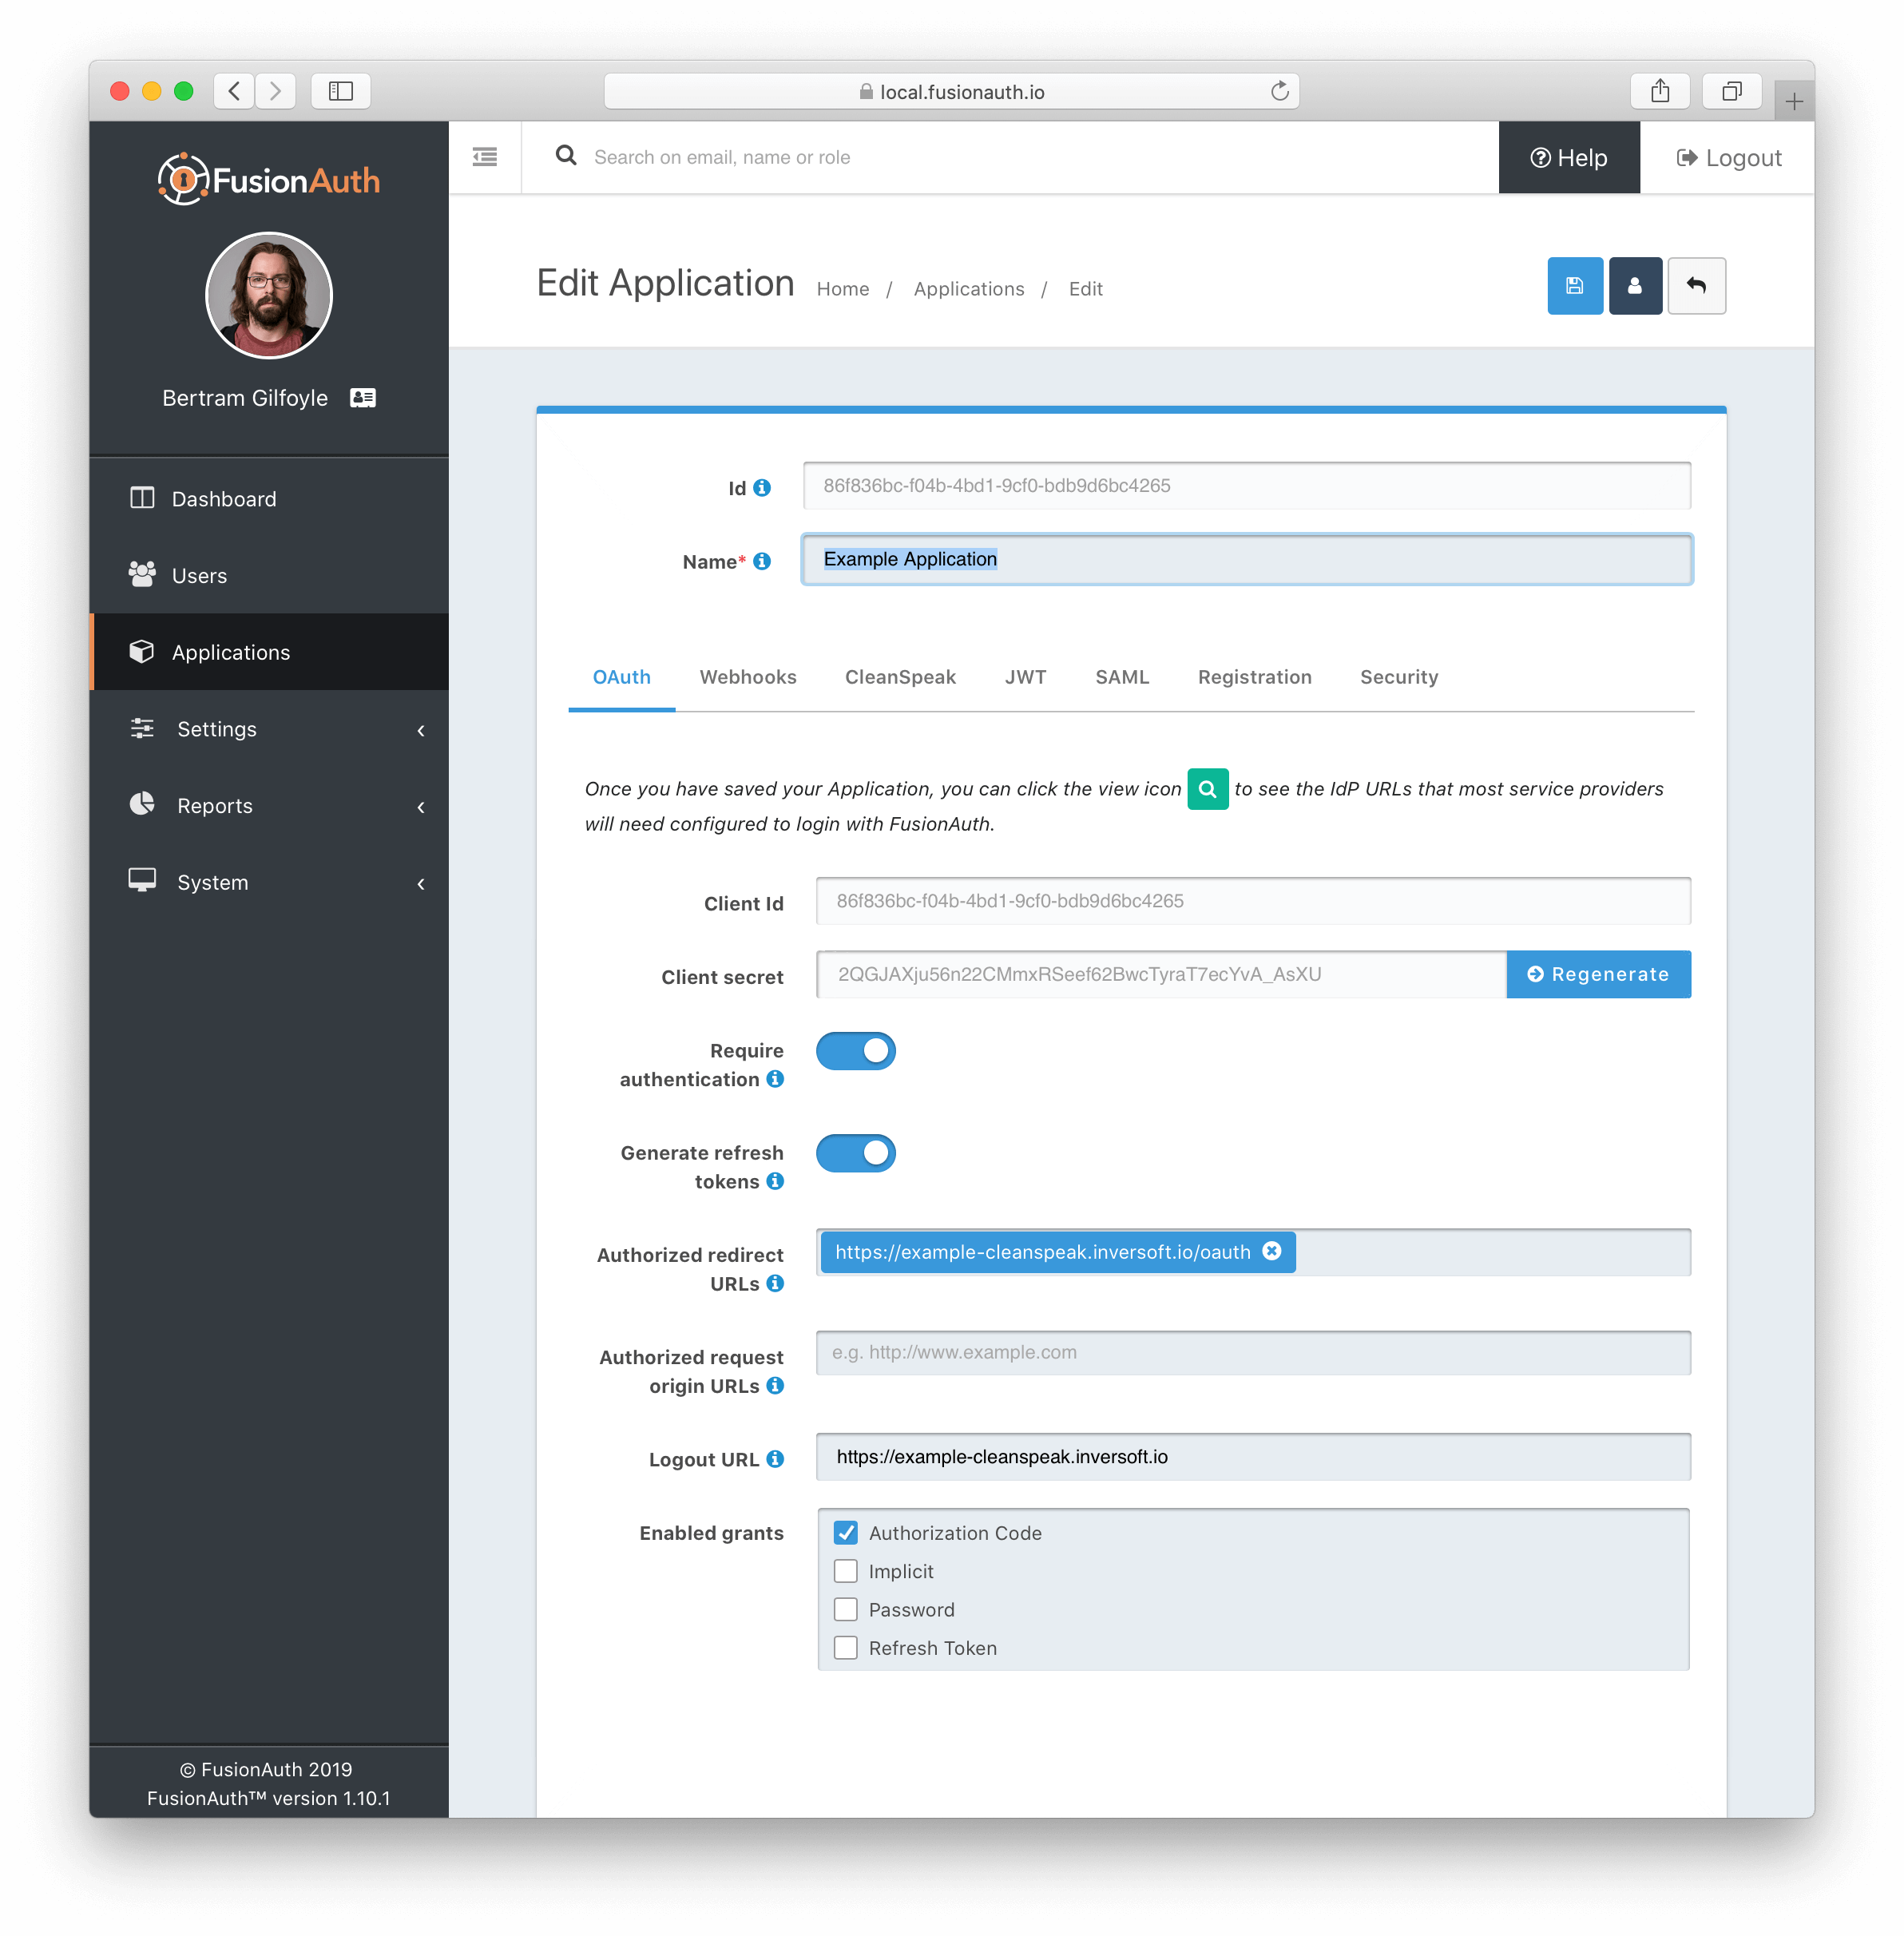
1.1.2. You will need to immediately edit the application
-
Set the redirect URL to your CleanSpeak URL with a path of
/oauthfor example:https://example-cleanspeak.inversoft.io/oauth. -
Copy your client id and client secret for later
-
(Optional) Set the logout URL to your CleanSpeak URL so that after a logout the users will be redirected back to the login page.
-
(Optional) Remove the refresh token grant to lock down the security.
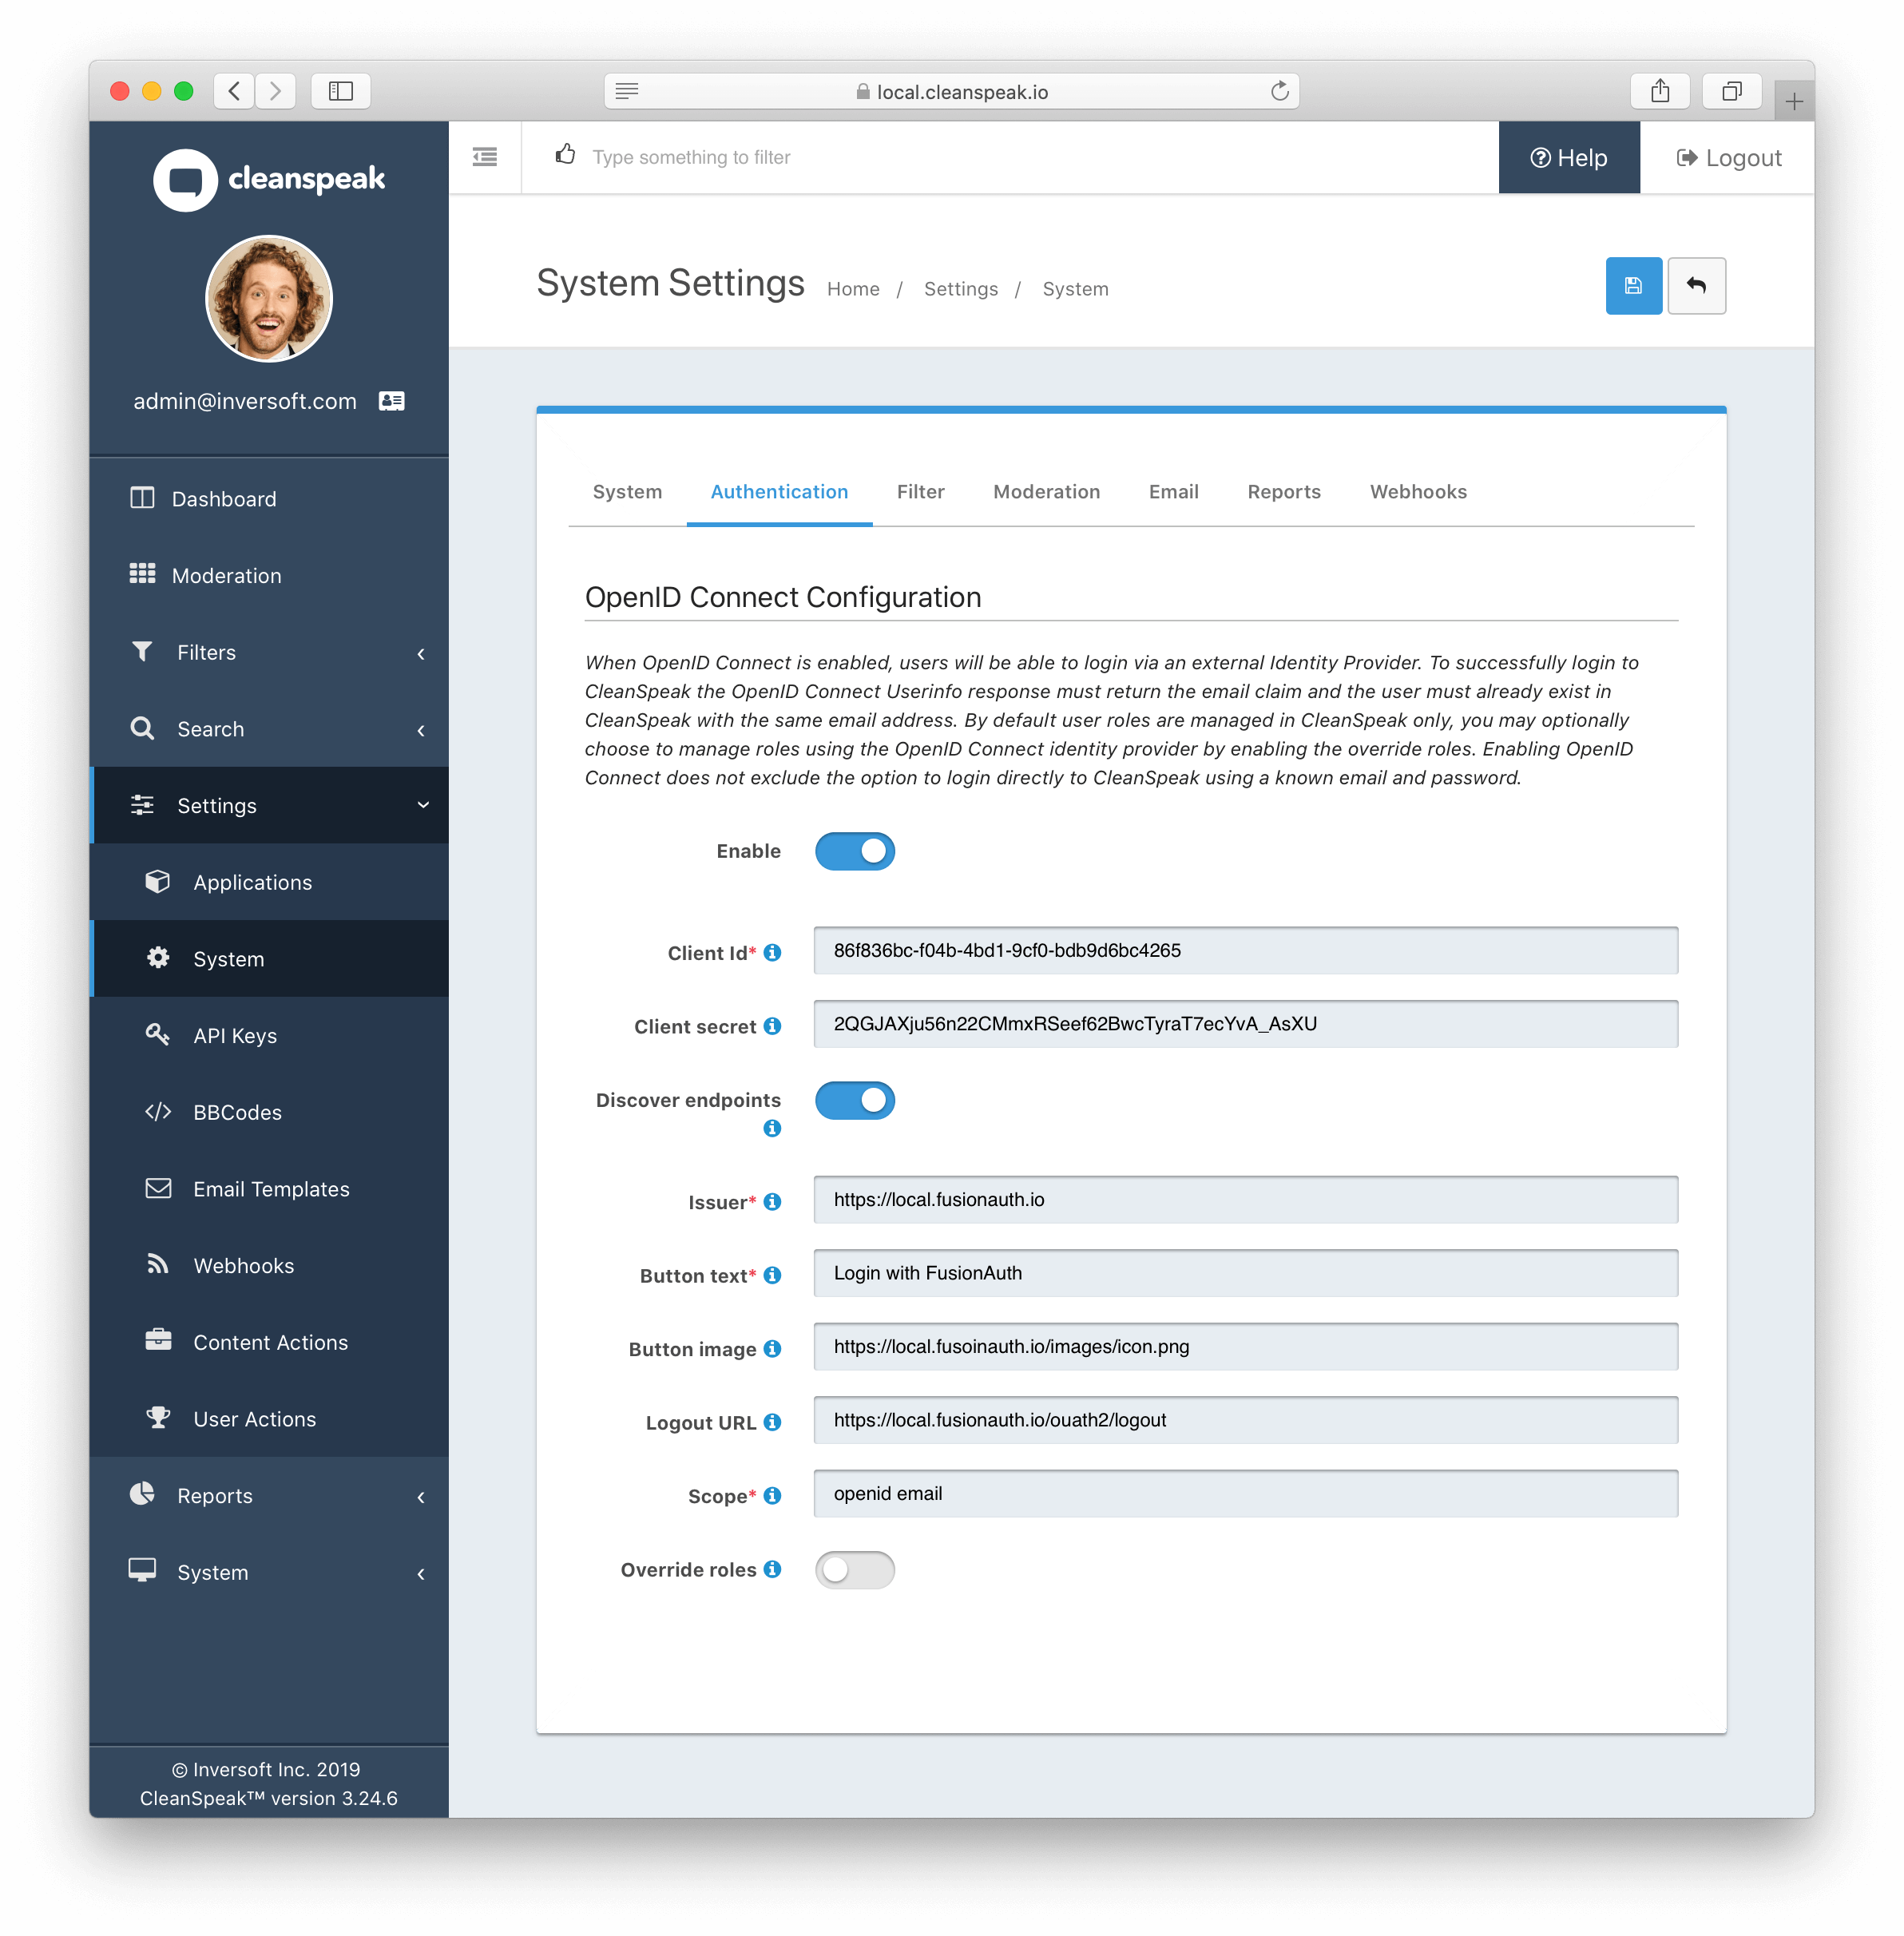
1.1.3. Now we need to copy the values from the last step into the CleanSpeak configuration.
-
Copy client id and client secret
-
Set the issuer to the domain of your fusionauth domain. Ex:
https://local.fusionauth.io -
Set the button text. Ex:
Login with FusionAuth -
(Optional) Set the button image. Ex:
https://local.fusionauth.io/images/icon.png(Hint: there is a fusionauth icon available at/images/icon.pngon every instance of FusionAuth) -
(Optional) Set the logout url so that a user is logged out of FusionAuth globally. Ex:
https://local.fusionauth.io/oauth2/logout -
Save

1.2. Azure Example
Azure OpenID has a slightly different workflow because it uses a slightly different path for the issuer. This is because Azure uses tenant specific OpenID URLs.
1.2.1. First we again need to create an application.
-
First navigate to your portal
-
Open
Azure Active Directory -
Open
App registrationson the new inner left menu. (The screen should look like the image below)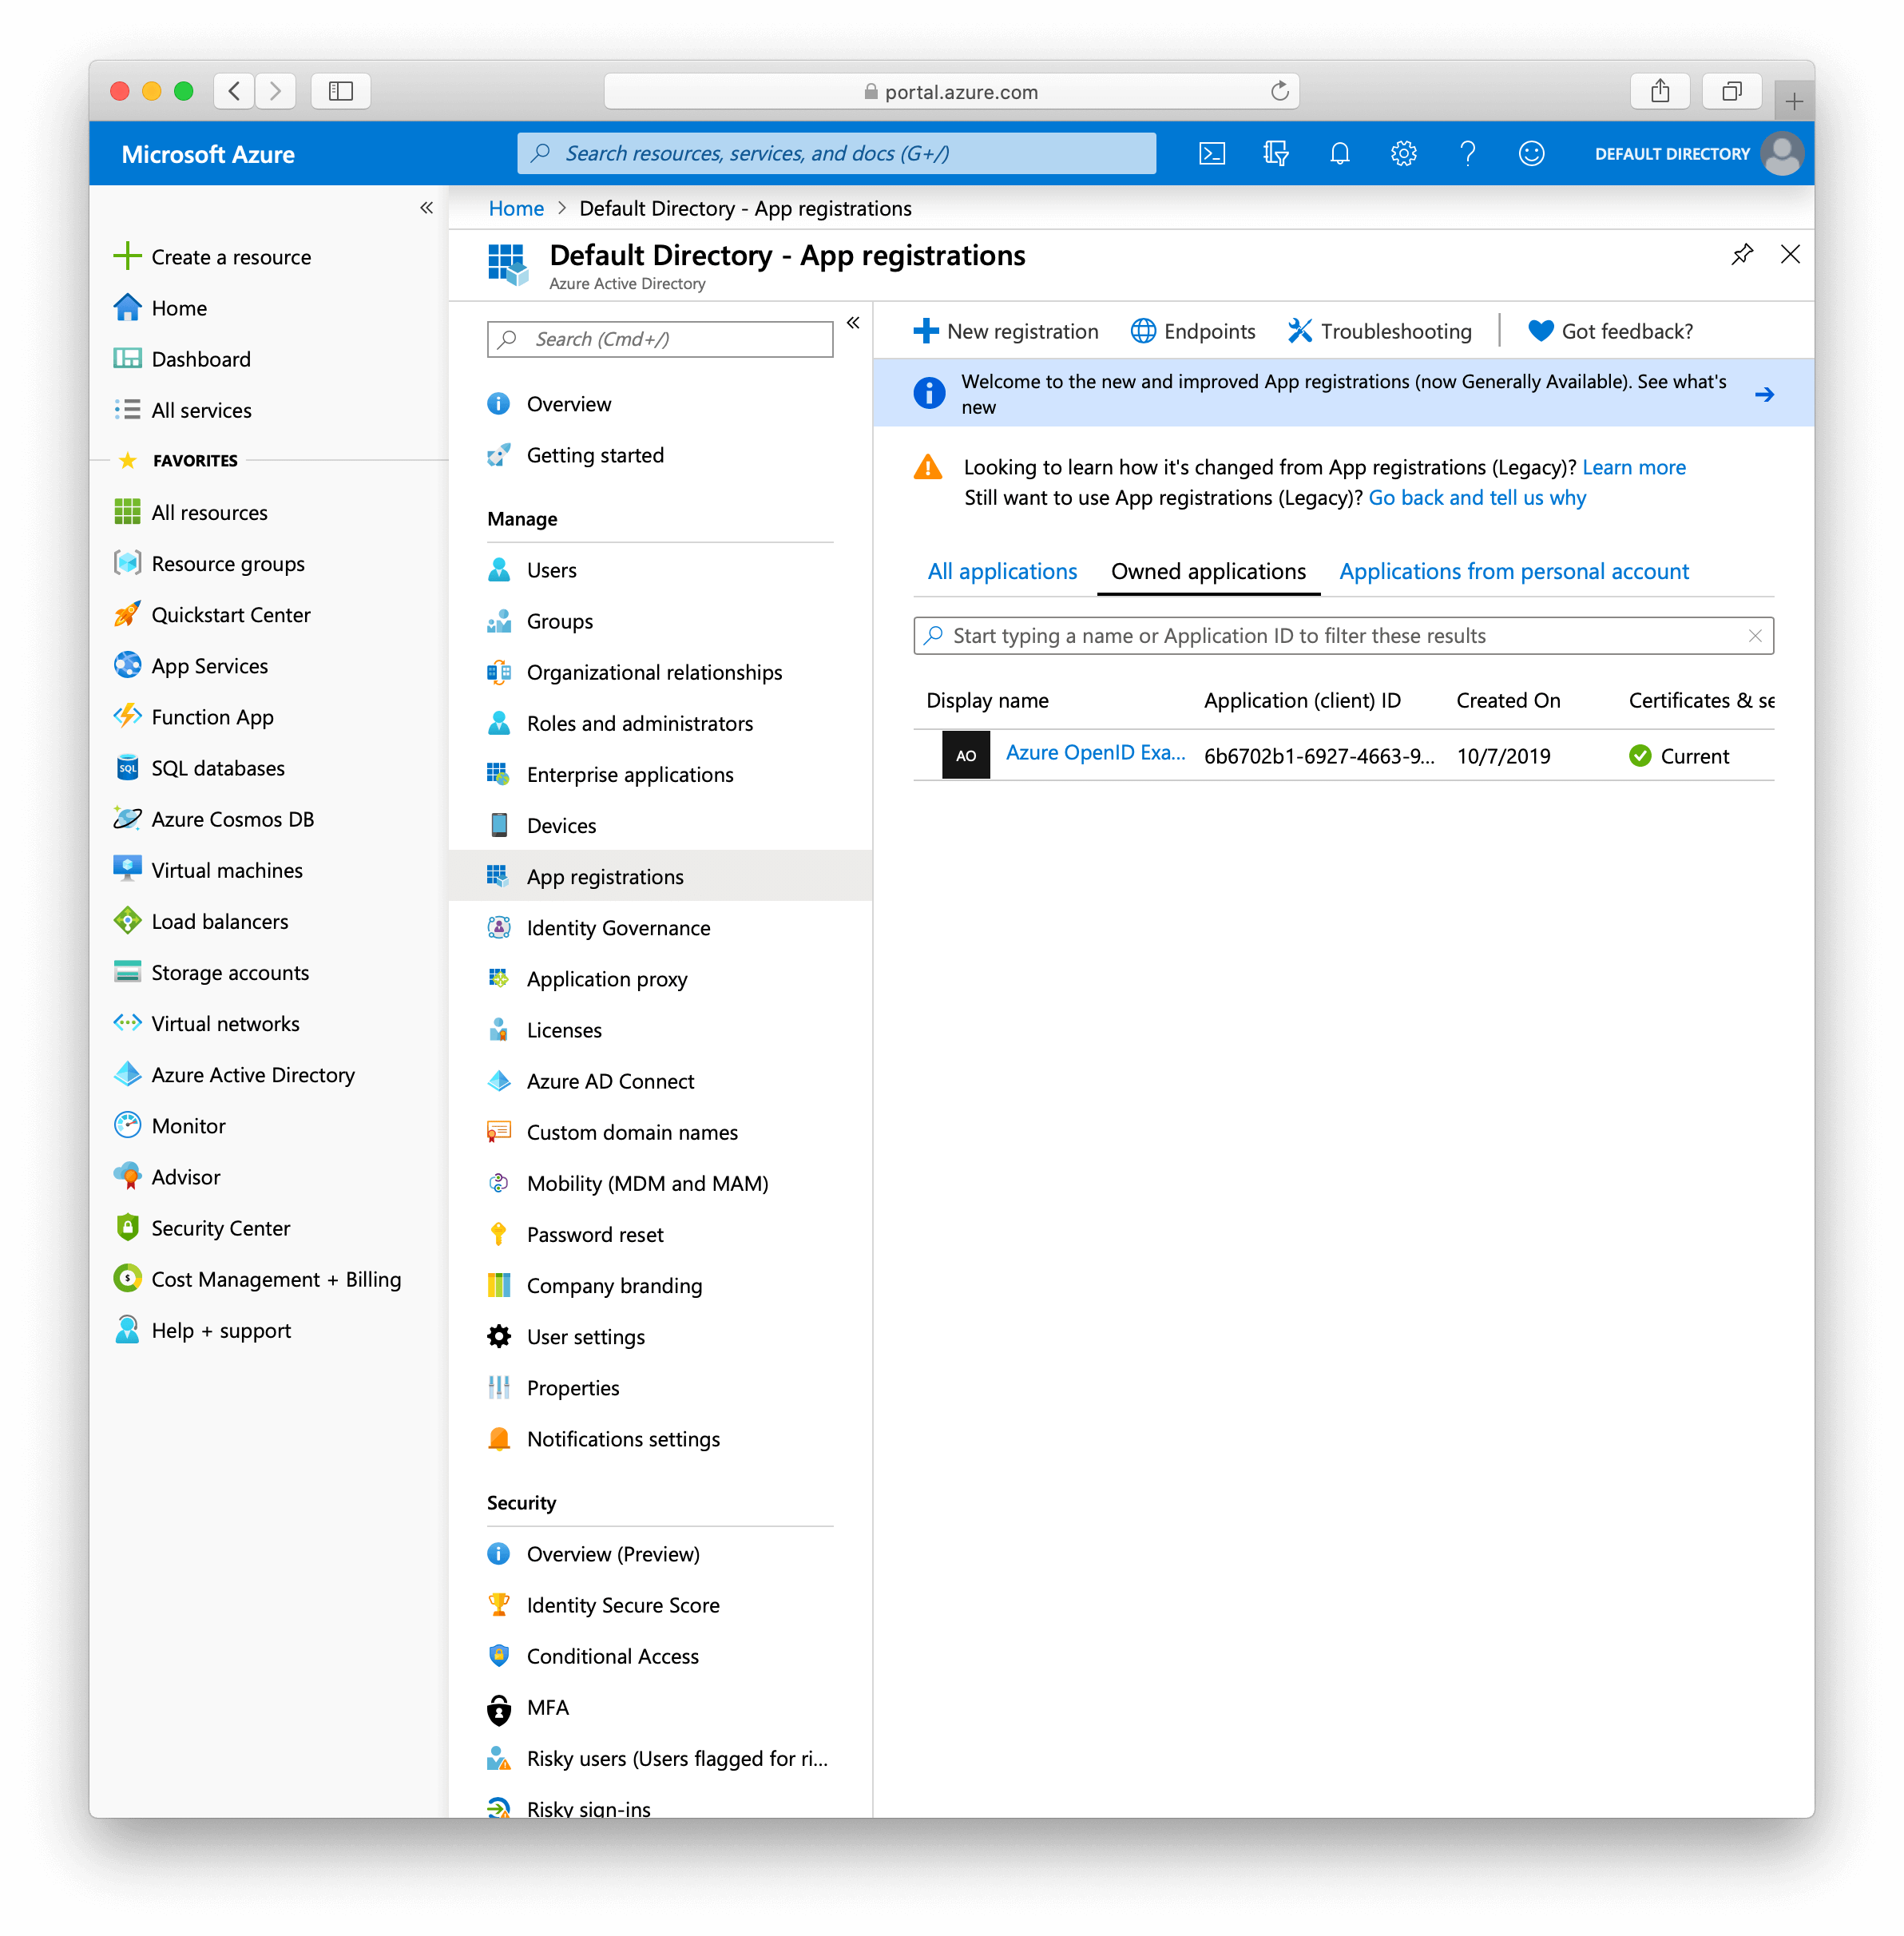
-
Click
New registration -
Choose a name and set the redirect URI
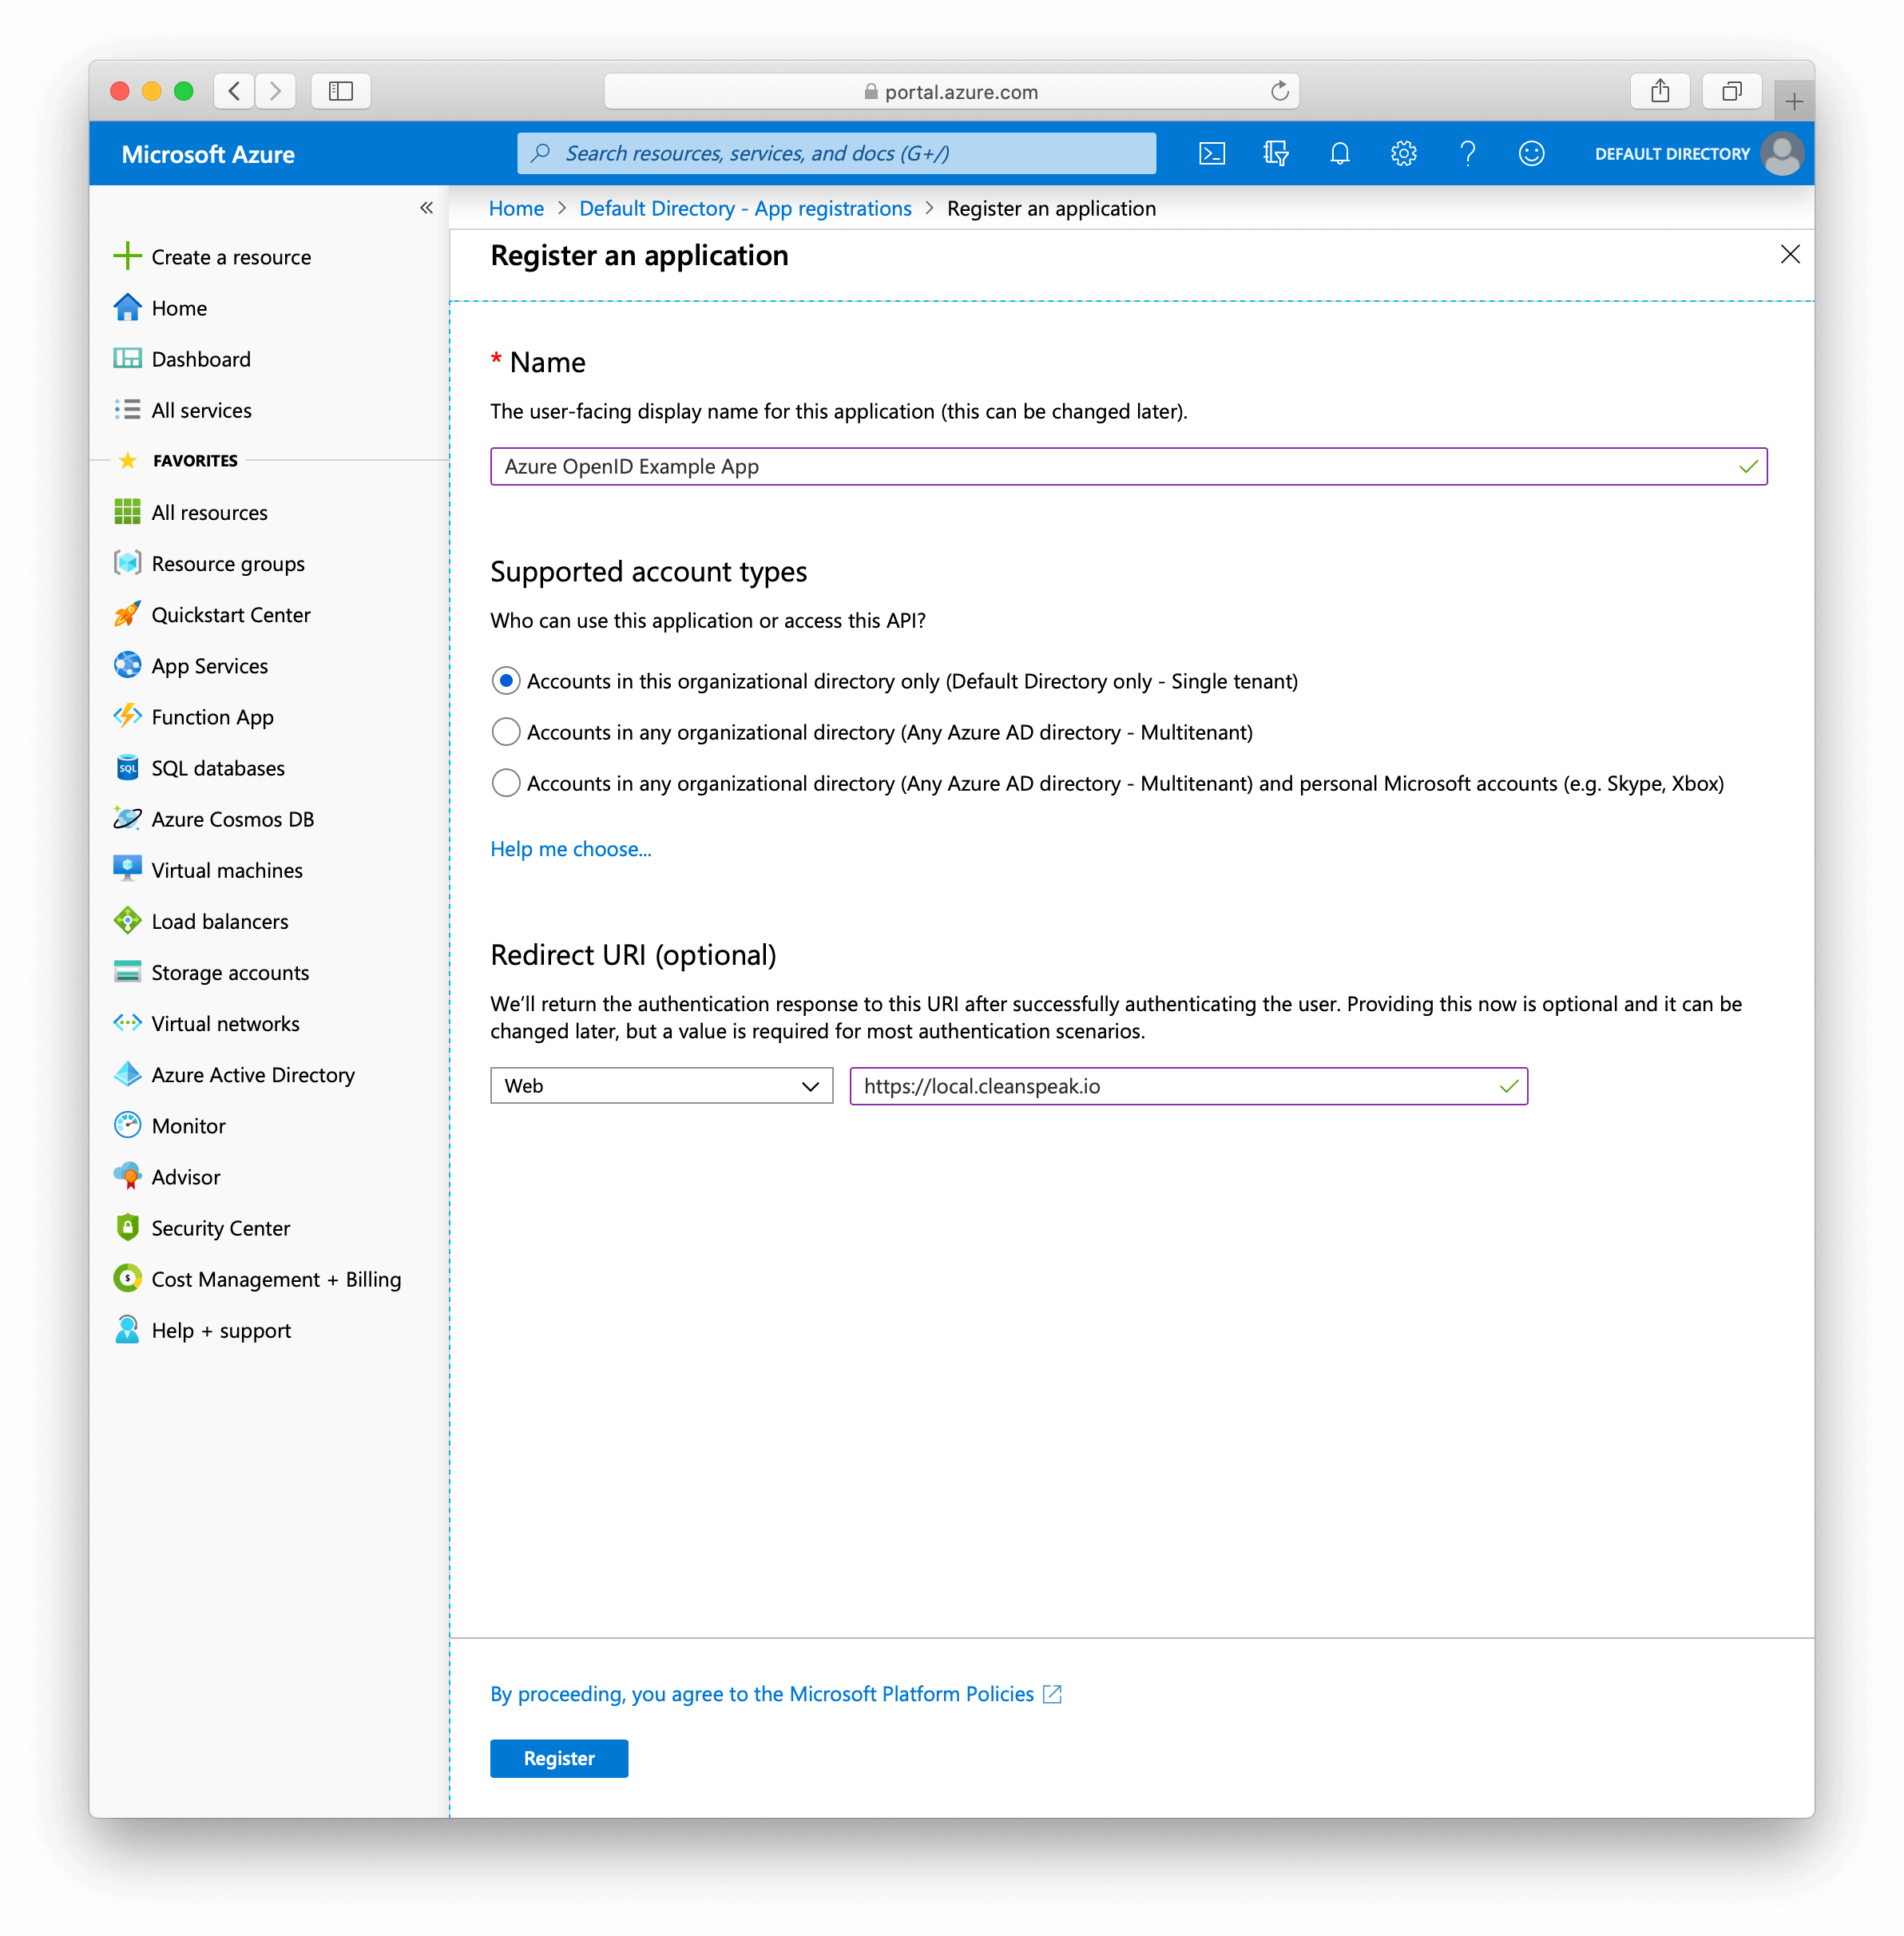
-
Click register
1.2.2. You should now see a screen like the following.
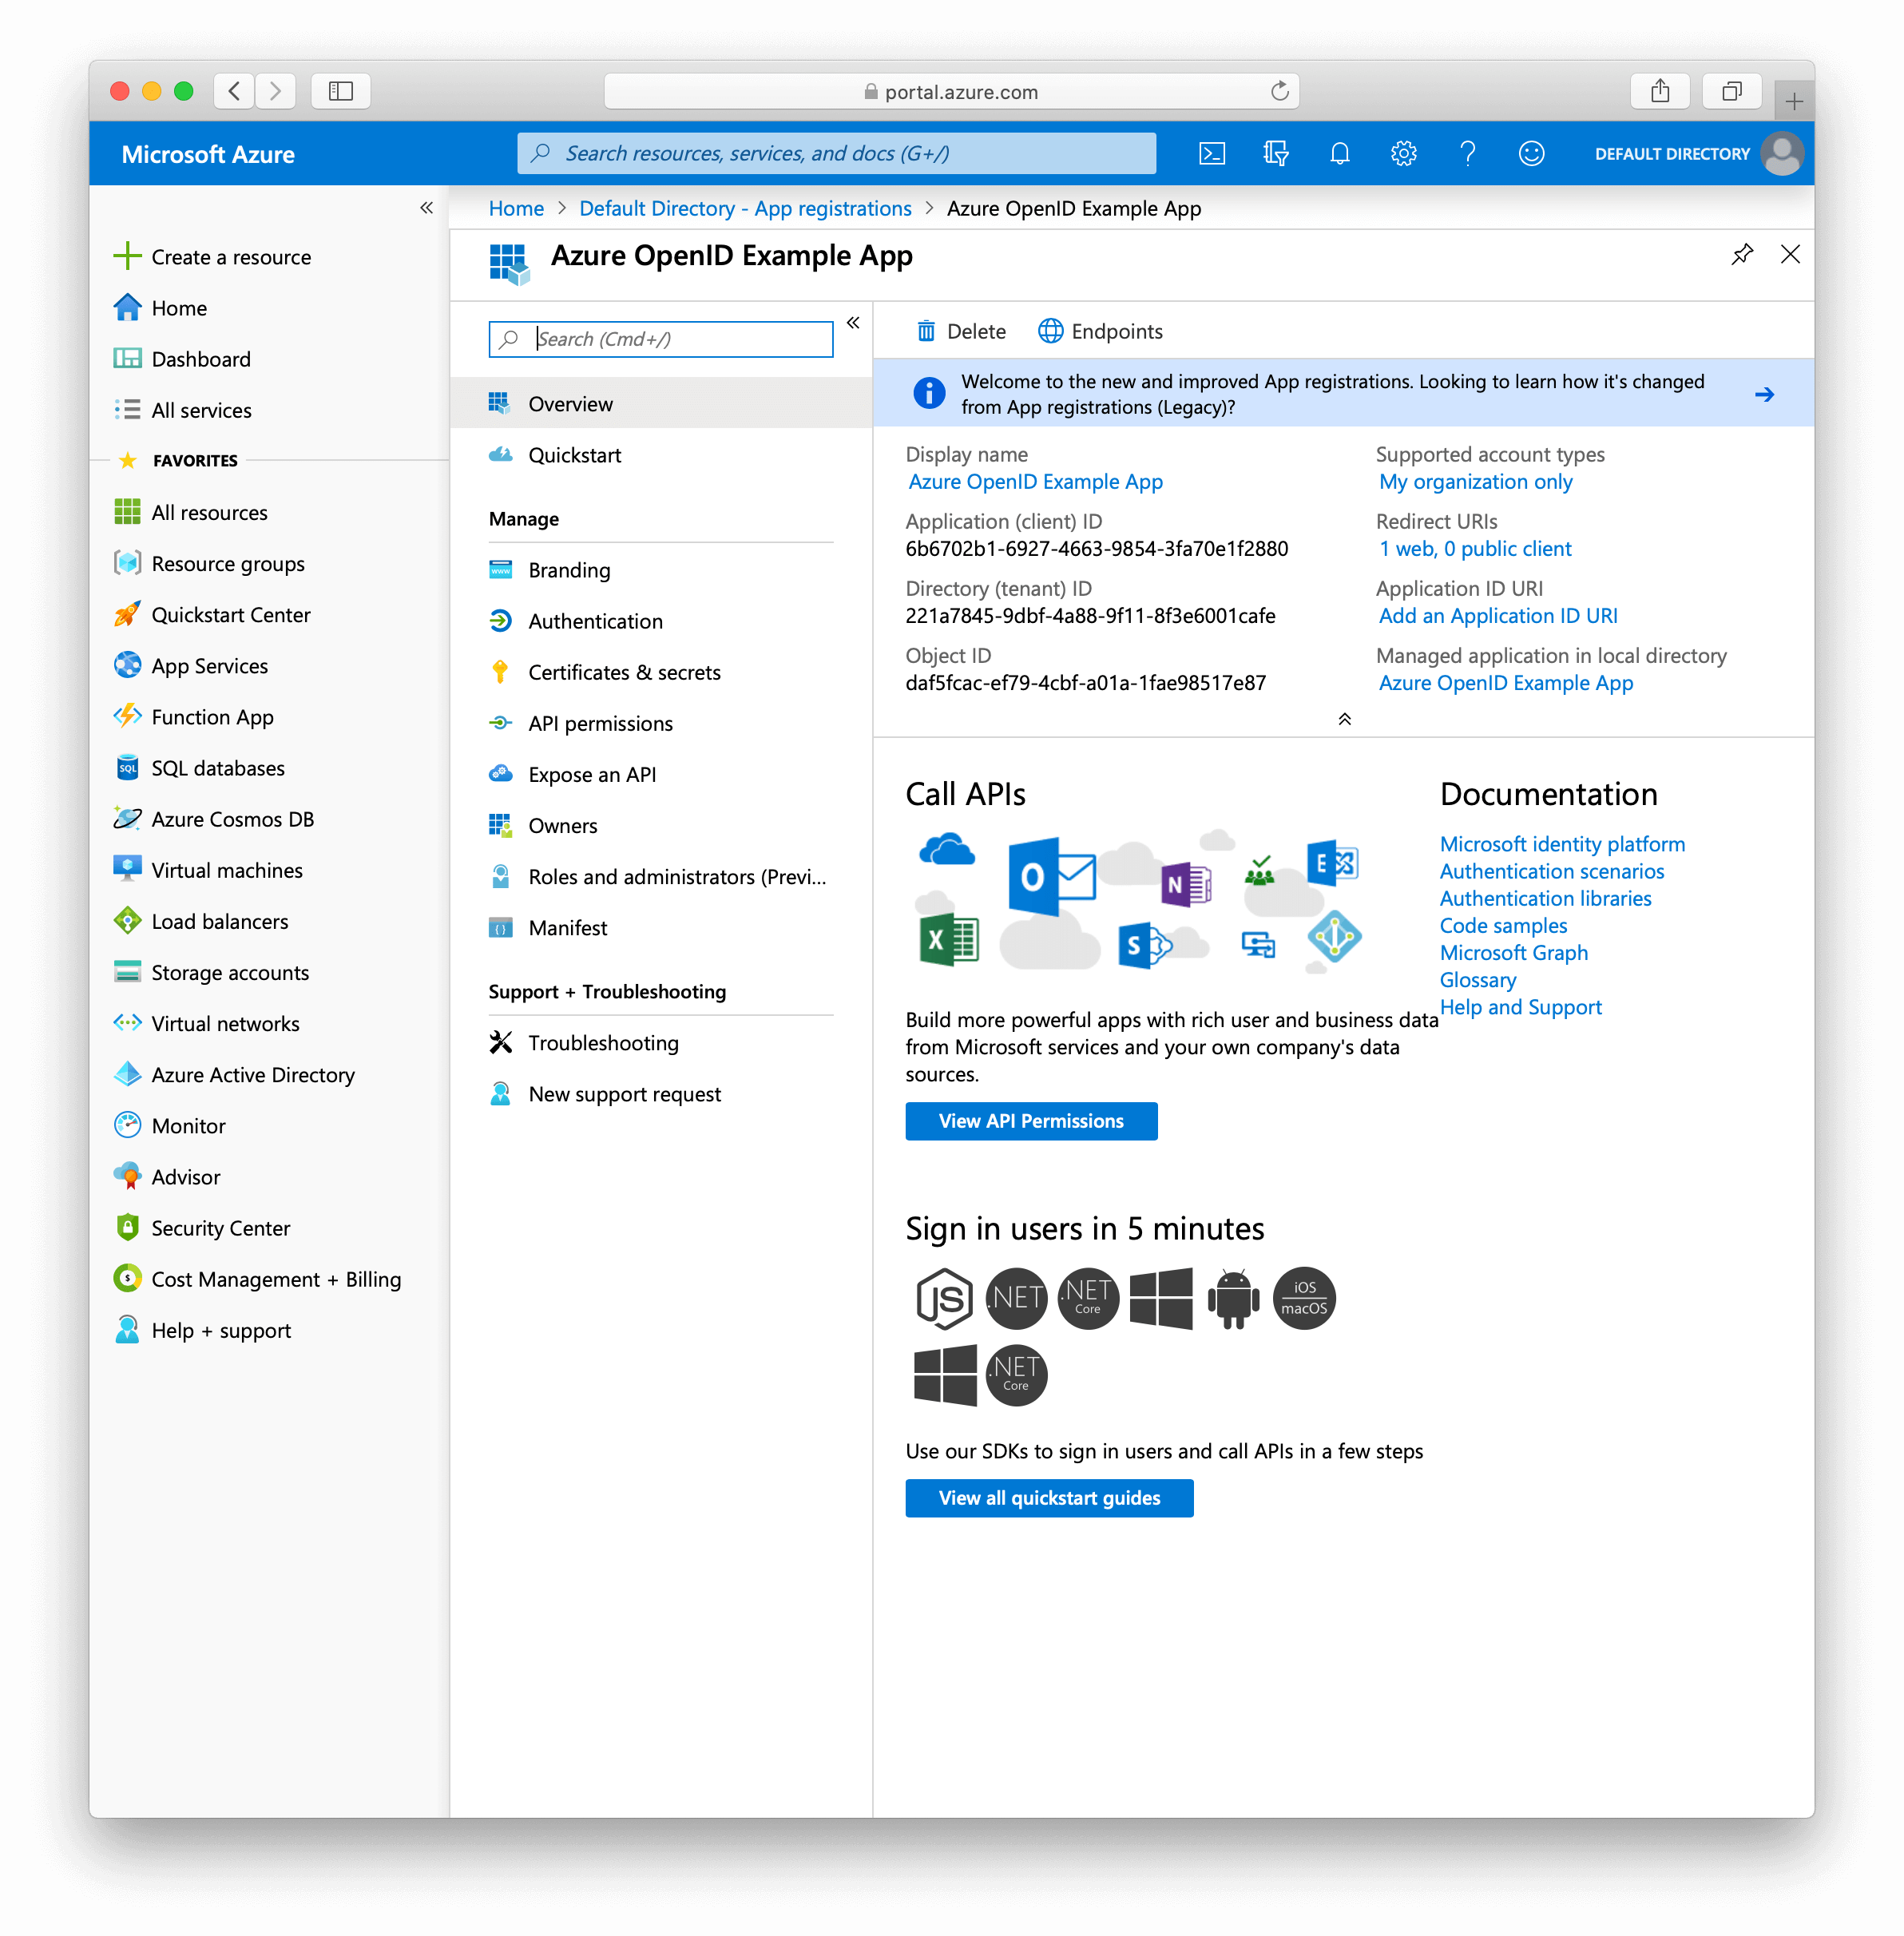
1.2.3. Now open CleanSpeak System Settings
-
Paste
https://login.microsoftonline.com/{tenantId}into the issuer field of your. (With{tenantId}replaced with your own) -
Copy the Client ID from your azure application and paste that in the Client ID field of CleanSpeak
1.2.4. Now we need a client secret (which is required for all web based applications on Azure)
-
Go to your Azure app
-
Open certificates and secrets
-
Click
New client secret -
Choose a name for this secret and create it
-
Copy the secret value to your CleanSpeak OpenID Settings
-
Click save
1.2.5. You can now login with Azure
